Setting up Advanced Issue Sync Forge Plugin with Rovo on Target System
Please take note that this section only requires to be setup on the Target System.
Installation Link
Advanced Issue Sync Forge Plugin
Setup ROVO on Cloud Instance
Since we are utilizing ROVO for the Advanced Issue Sync Forge Plugin we need to first install ROVO on the instance. To do this:
Go to Atlassian Administration page and click on overview on the top navigation
Then click on the Add product on one of the quick actions provided on the page
Select Atlassian Rovo on the list then click on Select button on the lower part of the page
It would tell you the product information just proceed and click on Agree and start trial button on the lower part of the page
Wait for Atlassian to setup ROVO on your organization. Then click on Activate a site button on the page right after adding ROVO on your organization.
Select your site to activate ROVO then click on next.
Confirm the site where you want to add ROVO and click on the Activate button on the lower side of the page. And your done ROVO is now added on your instance!
Here is a demo video on installation of ROVO on cloud instance.
Setup ROVO on Cloud Instance
Setup the Technical User
When setting up the Advanced Issue Sync binary and app, a technical user is configured which will be used by the binary to be able to handle Jira Issue related processes such as Create, Update, Transition, etc.
The technical user that is configured for the binary should also be on the Advanced Issue Sync App Configuration. This will be later used by the App to know what changes have been done via Issue sync process.
To setup the Technical User for the App, please do the following steps:
Click on Apps from the top navigation
Click on Manage Apps
From the left Navigation Bar, click on Advanced Issue Sync Settings
Choose a user for the Jira Sync technical user field
Click Submit and wait for the verification flag to show.
Here is a demo video on setting it up:
Setting Up Rovo Automation
To setup the Rovo Automation, please look at the video or do the following steps:
Setting Up Rovo Automation
Download the following configuration file automation-rule-23185929-202411291512.json
Then to import the automation go to Jira settings → System which can be found by clicking on the cog icon on the top navigation.
Then on the left navigation look for Automation → Global Automation then click on it
Click on the
...button beside the create rule button; and choose import rulesUpload the configuration file that we just downloaded then proceed to the next step
Select the project/s you want the automation to run to then proceed to the next step. It would then process the import and you can click on done after it is finished.
We will now update the automation to set the technical user to your defined technical user.
Change the value on the Creator equals component to your technical user
Change the value on the Initiator is component to your technical user
Then click on ROVO automation component we are going to update this by following these steps:
Click on the Login button beside the Warning note of Rovo Agent. Wait for it to finish.
Then there would be a Change connection link besides the “Use Rovo Agent“ text on the top right of the automation component. Click on it. There would be a modal to show to check if you are successfully connected then click on done.
(IMPORTANT) Update first the automation while it’s still turned off this would enable us to edit the Rovo Agent field on the automation.
Then click on Then: Use Rovo Agent automation component again and update the Rovo Agent field to Advanced Issue Sync Agent.
Click on Next and enable the Automation Rule.
Turn on the Automation and your good to go.
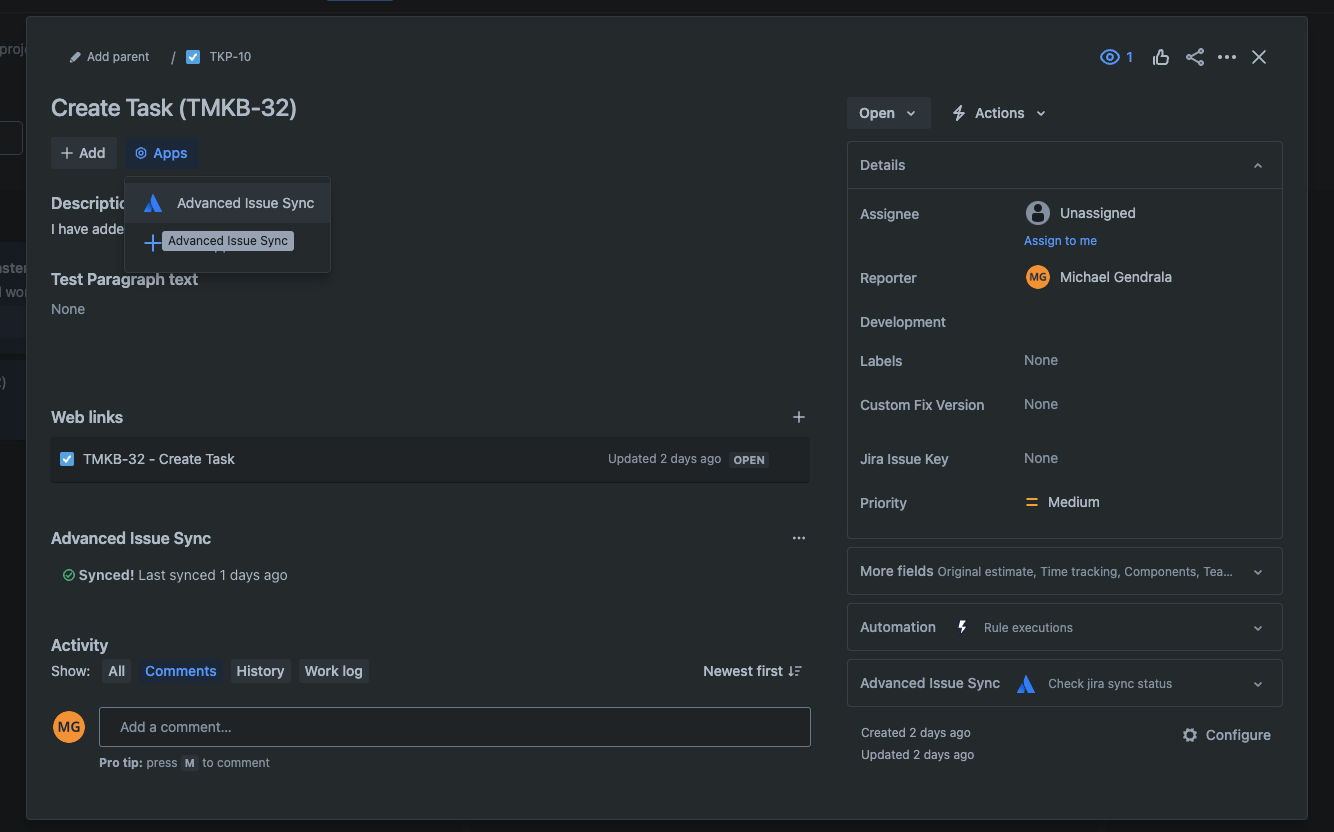
Enabling the App on a Project Issue
To enable the Advanced Issue Sync information panel on an Issue, while the Issue is fully opened click on the Apps button below the Issue title and click Advanced Issue Sync.